
Comprehending how to paint a bathroom vanity is crucial for everyone. Often they appear quite uninspiring and lack character right off the assembly line. If your vanity continues to retain its monotony since the time of acquisition, then you aren’t enhancing your bathroom’s potential. By merely adding a coat of paint, your bathroom’s elegance can be notably amplified.
A bathroom is no longer a place where we just go for ablutions. Today, we love to spend time before the mirror, in the tub or just sitting on the toilet reminiscing about the day that was, or will be. If it looks too plain, well, you will not want to spend time there.
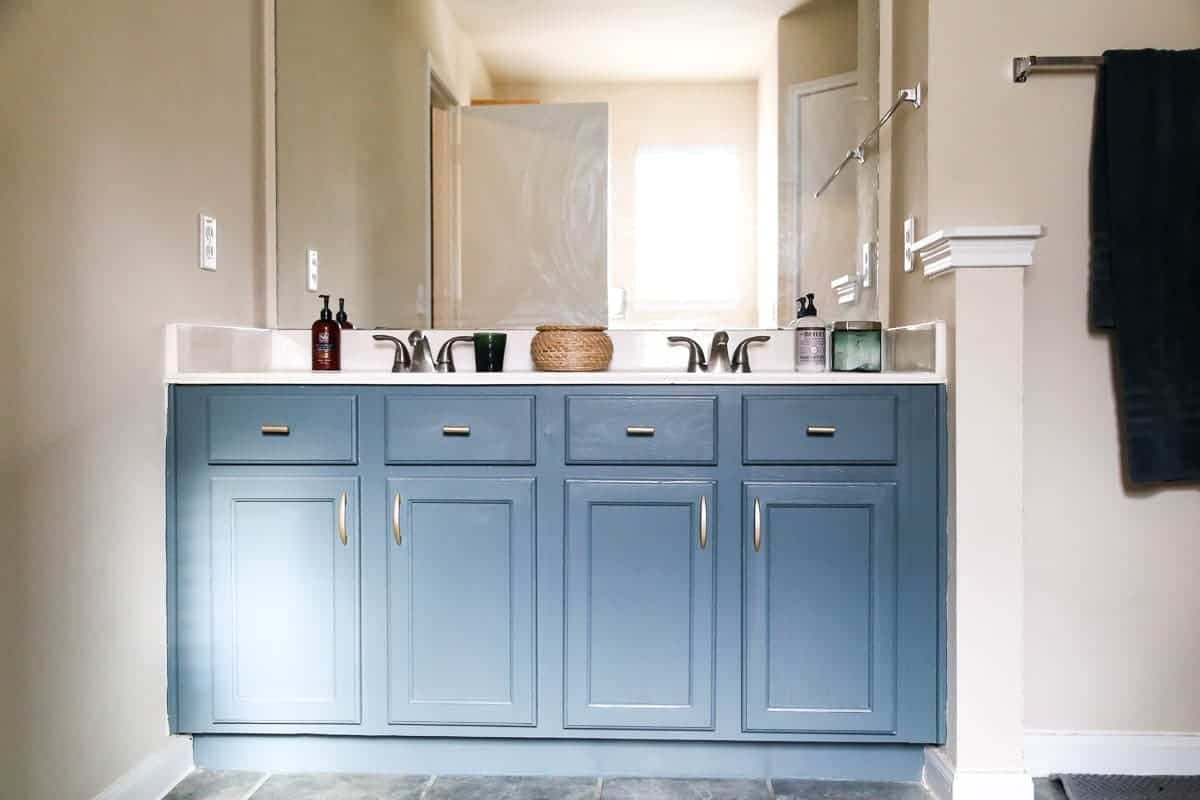
But you have the power to change how the bathroom looks. Start by painting the vanity. It is big, more visible, and anyway, it is the most “paint-able†feature. Most of the bathroom wall is tile anyway. Therefore, if you need a dash of color, it has to go on the vanity.
We dare you to accompany us on this step-by-step journey for painting bathroom vanity.
What You’ll Need?
- 80 to 150 grit sandpaper
- Paintbrush
- Screwdriver
- Primer
- Painters tape
- Cleaner (degreasing)
- A piece of sponge
- Enough paint
- Small painting roller
- Covers for floor and other items in the bathroom
- Small bowl or box to keep small items
- Whitewood filler
- Fan
Choose the Right Paint
The outcome of your vanity restoration job depends on the type of paint that you buy. The choice is usually between two types of paints – latex/water-based paint or oil-based paint. The former is better because its smell dissipates fast. The oil-based and semi-gloss paints have excellent leveling, but their odor takes quite a long time to dissipate. Today’s latex paints have leveling ability that is almost similar to that of oil-based paints. These paints are also quite durable. If you would rather not use either latex or oil-based paints, you can use chalk-finish paint. Unlike the first two, this kind of paint does not require you to apply a coat of primer. Therefore, it saves you money and time.
Which paint brush should you use?
When choosing a brush for painting your bathroom vanity, you must consider a few important features. One of them is that the brush should be zero to low-shedding variety. That way, it can retain the bristles in great shape throughout the painting experience. The brush should also be able to apply different types of paints. When you are done painting your vanity, you might want to apply a coat of wax on your old furniture. You need a brush that cleans easily such that it leaves no traces of old paint. Not many brushes meet these merits. However, the Brossum 2-in-1 brush For Wax and Chalk does an excellent job. It also has an ergonomic handle so you can work longer without cramping your wrist.
Best Ways to paint bathroom vanity
Knowing how to paint bathroom vanity is all nice and well. However, doing the actual job requires patience, time, and precision that is almost military. You should set aside enough time; say about 3 days for it.
Here is a step-by-step process for painting a bathroom vanity:
Step 1: Choose a good place to do the job
You must choose a good place with plenty of space and natural light. You should also ensure that the space has enough ventilation. The more air that can get into the room, the faster the doors and the vanity will dry after painting.
When you choose the space, lay a cover on the ground/floor so that you do not get paint in places where you don’t want it. After you have painted the doors, you will want to place them somewhere. Prepare a place in advance and lay a cover there too.
Step 2: Bring in a fan
Cabinet paint is strong and smelly. Having your windows open is not enough to dissipate the smell fast. You must have a working fan so that you can keep it going as you paint. You will also need to keep the fan running 24 hours after painting.
If you buy high-quality vanity or cabinet paint, the strong smell should be gone after 24 hours, and then you can have your bathroom back. You can have a standalone fan that you can plug into the nearest socket. If you have a ceiling or wall-mounted fan for the bathroom, use it.
Step 3: Remove the cabinet doors and the metal parts
A professional painter would never get paint on the metal handles and hinges. Even if you are a DIY enthusiast, the truth is that you still want the outcome to look great. Therefore, get your screwdriver and remove the cabinet doors, and then remove their metal parts. Remove the door handles and hinges. If your vanity has drawers, remove their handles too.
Step 4: Clean the vanity and the doors
No matter how much care you have been giving your vanity, it will still have some dust in some places. Therefore, clean the doors and the vanity. This is why we included a cleaner in the list of items needed.
After removing the doors and the metal hardware, clean everything up. Degreasing cleaners work best. After cleaning, you can wipe it out with water, and give it time to dry and the vanity and doors will be spotlessly clean.
Check the interior of the vanity carefully for any signs of mold or mildew. If there are any, you should use a bleaching product in your cleaning solution. Mold is a serious indoor allergen that thrives in dark and moist spaces. Being in the bathroom, the vanity makes a good environment for mold.
The most important thing to note here is that you should not let the cleaning solution dry up before you clean it off. It might affect the paint that you apply to the vanity. Therefore, it is better to clean one door at a time.
Step 5: Sand the vanity and the doors
If you feel the surfaces of the vanity and the doors, you will realize that they are too smooth. However, the problem with smooth surfaces is that they do not hold the primer or the paint very well.
When you sand them, they attain some roughness, which is good for the paint. The sanding must be light though, nothing that will eat into the wood too much. You may use 120 or 150-grit, but even 80-grit sandpaper will suffice. Dampen a piece of cloth, wring it out and use it to wipe the dust off the vanity and the doors.
Step 6: Fill holes with wood filler if there are any
If there are any nail holes on the vanity or its doors, you can fill them with wood filler. For older vanities, you might not even want to return the handles and hinges where they were original. In that case, you have to fill the old holes with filler.
When the filler is dry, you will need to scrub out any excess amounts. You will notice that it forms lumps on the surface, but you need the surface to be leveled out. You can use a scraper to get rid of the excess filler. After that, sand that area lightly so that the entire surface is even.
If you did a lot of sanding, you may need to vacuum off the white dust. Therefore, you need a vacuum cleaner. However, if you just worked on a few holes, just use a damp piece of cloth to get rid of all the dust. Wipe everything with a damp cloth since dust spreads easily and it affects the outcome of your painting job.
Step 7: Tape off the counter, floor, and walls
Any area that should not get paint should be protected from splashes and dots of paint. Take your painter’s tape and tape off the walls, floors, and counter.
When you start painting, you will do it faster than you would without this protective tape. If you have never painted before, make the tape wider to cover more area. That way, even the tiniest splashes will not find their way where they are not wanted.
Step 8: Prepare your paint
Most cabinet paints come ready to paint. However, some may require you to stir thoroughly before you paint. It is rare to get paint that you need to thin, but in case you do, it is easy. If you are using water-based latex paint, you will need to thin it with water. If you are using oil-based paint, use turpentine or any other recommended paint thinner product.
Step 9: Applying your coat of primer
The vanity may have come with paint from the manufacturer. Even if it does not have paint, it may have been stained a certain color and maybe even had a coat of wax or varnish applied. This is why you need a primer.
The best primers dry fast. They are also sticky so that after you are done with the priming, they cover the old varnish, stain, or paint completely. You may opt to skip using a primer, but you will have to paint two or more coats of paint for the best outcome.
Applying the primer is the same as painting. Therefore, start with the hard to reach places like the edges and any sunken areas using your brush. You can then use a roller to apply the primer to the rest of the big surfaces. Any surface that you intend to paint should be primed, even the interior of the vanity.
After applying the primer as recommended above, let it stay overnight to dry completely. You can keep your fan running all the time to enhance the drying time.
Step 10: Painting the hard to reach spaces with a brush
Painting comes the day after applying the primer. Start with the brush again. Paint the hard to reach areas with a brush. This includes the corners and edges. Just dip the brush bristles halfway into the paint and apply a coat lightly. That way, the paint will not bead or roll.
Paintbrushes are notorious for making streaks, but there is a good style to avoid that. Just pass the brush lightly over the area that you have painted. That should take care of any streaks.
Step 11: Painting the vanity and the doors
With the corners and edges primed, it is time to get down to the business of painting the larger surfaces. Use your roller so that you can do a faster job. Dip the roller halfway into the paint. When you start rolling it on the surface that you are painting, the paint will spread all over the roller.
You can paint in zigzag patterns, but make sure to pass the roller over painted areas to spread the paint evenly. Paint one side of the doors first, wait for them to dry, and flip them over to paint the other side. Have your brush nearby so that you can touch any areas that the roller fails to reach.
Can you use a roller to paint a bathroom vanity?
Yes, you can. However, you should not use a big roller. Buy a smaller roller, use it delicately so that paint does not bead up, and roll it from top to bottom or in zigzag patterns. You should be careful to dip the roller halfway into the paint. Unlike a brush that leaves streaks, the roller does not cause streaks. Move the roller back and forth, so that the paint is evenly distributed over its surface. You can then paint the vanity in zigzag patterns and then fill the remaining gaps.
How Much Does It Cost to Paint a Bathroom Vanity?
Overall, you can spend between $590 and $1320 to paint a bathroom vanity. The bigger it is the more you will spend and vice versa. The cost can be calculated on an sq. foot basis. A square foot can cost between $4.95 and $11.00. Of course, if you will be doing the job yourself, you will spend less since you do not have to pay a pro. To determine how much it will cost you to paint your bathroom vanity, you need to get the measurements right. Starting with the cost of the materials, a gallon of latex, shellac, multi-purpose or oil-based primer should cost you between $8 and $10. Cabinet paint costs about $25 per gallon. As you can see, there are many dynamics to consider. However, you can use online calculators to estimate the cost of painting bathroom vanity.
Final Verdict
Follow the 11 steps that we have discussed here on how to paint your bathroom vanity to give your old bathroom a new lease of life. If you do everything right, you will get the same results that a professional would and save yourself a substantial amount of money in the process. You have also seen the estimated cost of painting the bathroom vanity. Whether you hire a pro or you do it yourself, you have seen how easy it is to give your bathroom a spanking new look.